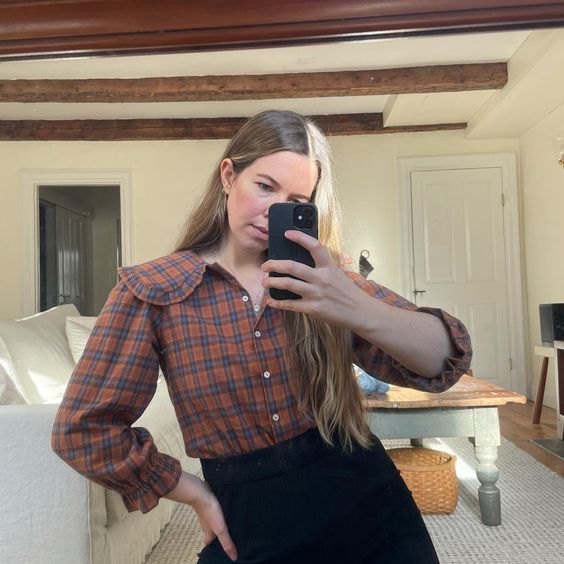
Antoinette Shirt
Pattern: Antoinette Shirt by Isa In Stitches
Fabric: 3.7 oz 100% cotton gauze I had on hand
Buttons: vintage from my grandma's button stash
Notions used: thread, buttons, interfacing and bias tape
I am a big fan of the statement collared button downs of Ganni and Rudy Jude, so when I saw this Antoinette Shirt pattern from Isa In Stitches, I immediately wanted to make it! I specifically made this top to be similar to the Rudy Jude pony blouse. I loved Lisa Tea's DIY version on Instagram and wanted to make something similar.
 |
| The Rudy Jude Pony Blouse |
 | |||||||||
| Ganni's amazingly huge collared top | |
I
thought I'd make a version using some inexpensive cotton gauze I
already had lying around and create a wearable toile before cutting into
some of my nicer vintage fabric. I printed the pattern, taped it
together and cut out the pieces on a Monday evening, and then after work
on Tuesday and Wednesday worked on sewing it up!
The
most challenging parts were the collar and the button holes, but I felt
empowered to tackle another button down blouse after working on the
Anthea Blouse last month. I have a new Babylock sewing machine with a
one step buttonhole foot that makes things way easier and less
intimidating.
 |
| @lisatea DIY pony blouse that inspired me |
The pattern came with three neckline options and three sleeve options. Isa generously made a video tutorial on YouTube for three variation possibilities! I wanted to start with a long sleeve version, but I may also make a short sleeve version too. I love how versatile this pattern is!
I did my first pattern 'hacking' if you will by using the sleeve cuff pattern piece from the M6979 pattern to create the cuff on the sleeves. I was very pleasantly surprised at how it turned out! The cuff suggested for the long sleeves was more elaborate than I was looking to do. I loved how a few people on Instagram did a shirred ruffle, three quarter length sleeve and I may try that way too on another top!
 |
| A version of the pattern with a looser sleeve and a smaller collar |
 |
| Another pattern option with a Victorian-style neckline and cuffed long sleeves |
The main issue I have with this top is that I did not place the top button high enough. This is because my machine was having issues creating the button holes through the multi-layer fabric thicknesses and I was getting annoyed. If I was more detail oriented I would put in a hook and eye so it stays together more at the top. I'll probably just be more aware for my next one on the top button placement. I may just wear this one with the top button unbuttoned so it's a nonissue.
 |
| A ruffled sleeve that is very cute that I want to try on future versions by @zoe_made |
Overall, I absolutely loved making this pattern and I look forward to making more! I made the largest size (I think it's EU 48) which is kind of a bummer that it's not available to larger bodied people. I saw there were similar patterns with more size-inclusivity, like this Kennie Woven Shirt by Style Arc.


Comments